
Hey there! I'm a supplier of Cast and Bandage products, and I've seen a lot of folks struggle with applying casts correctly. It's not as easy as it might seem at first glance, but with the right knowledge and techniques, you can get it done like a pro. In this blog, I'm gonna walk you through the whole process of applying a cast correctly.


Step 1: Gather Your Supplies
Before you start applying a cast, you need to have all the necessary supplies on hand. Here's what you'll typically need:
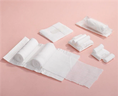
- Stockinette: This is a soft, stretchy material that goes directly on the skin. It helps to protect the skin from the rough edges of the cast and provides a smooth surface for the cast to adhere to. You can check out our Cotton Stockinette for a great option.
- Padding: Padding is used to add extra cushioning and protection to the areas that are likely to be under pressure, such as bony prominences. It comes in various forms, like cotton or synthetic foam.
- Cast Material: There are different types of cast materials available, such as plaster and fiberglass. Plaster casts are heavy but provide good support, while fiberglass casts are lighter and more durable. Choose the one that's most suitable for the patient's needs.
- Scissors: You'll need a good pair of scissors to cut the stockinette, padding, and cast material to the right size.
- Water: If you're using plaster casts, you'll need water to mix the plaster. Make sure the water is at the right temperature, usually around room temperature.
Step 2: Prepare the Area
Once you have all your supplies ready, it's time to prepare the area where the cast will be applied.
- Clean the Skin: First, clean the skin thoroughly with mild soap and water. This helps to remove any dirt, oil, or debris that could interfere with the adhesion of the cast. Pat the skin dry with a clean towel.
- Measure and Cut the Stockinette: Measure the length and width of the area to be casted and cut the stockinette accordingly. Leave a little extra length at each end to fold over the edges of the cast later.
- Apply the Stockinette: Gently roll the stockinette onto the limb, making sure it fits snugly but not too tightly. Smooth out any wrinkles or folds to ensure a smooth surface.
Step 3: Apply the Padding
After applying the stockinette, it's time to add the padding.
- Cut the Padding: Cut the padding to the appropriate size and shape, following the contours of the limb. You can use scissors to trim the padding as needed.
- Apply the Padding: Place the padding over the stockinette, focusing on the areas that are likely to be under pressure. Make sure the padding is evenly distributed and covers the entire area to be casted.
- Secure the Padding: Use tape or a small amount of adhesive to secure the padding in place. This helps to prevent it from shifting or bunching up during the casting process.
Step 4: Mix the Cast Material
If you're using plaster casts, you'll need to mix the plaster according to the manufacturer's instructions.
- Read the Instructions: Carefully read the instructions on the plaster package to determine the correct ratio of plaster to water. Different types of plaster may require different mixing ratios, so it's important to follow the instructions closely.
- Mix the Plaster: Pour the appropriate amount of water into a clean container and slowly add the plaster powder, stirring constantly with a mixing stick. Keep stirring until the plaster reaches a smooth, creamy consistency. Make sure there are no lumps or clumps in the mixture.
- Prepare the Cast Material: Once the plaster is mixed, you can start preparing the cast material. You can cut the plaster bandages to the desired length and width using scissors.
Step 5: Apply the Cast
Now comes the most important part - applying the cast.
- Dip the Cast Material: If you're using plaster casts, dip the plaster bandages into the water and squeeze out the excess water. Make sure the bandages are thoroughly saturated but not dripping wet.
- Start Wrapping: Begin wrapping the cast material around the limb, starting at the distal end (the end farthest from the body) and working your way up. Overlap each layer of the bandage by about half its width to ensure a strong and secure cast.
- Smooth the Cast: As you wrap the cast material, use your hands to smooth out any wrinkles or air bubbles. Apply gentle pressure to ensure the cast adheres firmly to the padding and stockinette.
- Shape the Cast: While the cast is still wet, you can shape it to fit the contours of the limb. Use your hands to mold the cast around bony prominences and joints, making sure it provides proper support.
- Trim the Edges: Once the cast is applied, use scissors to trim the edges of the cast to a neat and even finish. Make sure the edges are smooth and don't irritate the skin.
Step 6: Finish the Cast
After applying the cast, there are a few final steps to complete.
- Fold Over the Stockinette: Fold the excess stockinette over the edges of the cast and tuck it in neatly. This helps to protect the skin from the rough edges of the cast.
- Let the Cast Dry: Plaster casts usually take a few hours to dry completely, while fiberglass casts dry much faster, usually within 15 - 30 minutes. During the drying process, make sure the patient keeps the limb still to prevent the cast from cracking or shifting.
- Check for Comfort and Fit: Once the cast is dry, check to make sure it fits properly and is comfortable for the patient. Ask the patient if they feel any pressure points or discomfort. If necessary, make adjustments to the cast to improve the fit.
Step 7: Provide Aftercare Instructions
After applying the cast, it's important to provide the patient with proper aftercare instructions.
- Keep the Cast Dry: Make sure the patient keeps the cast dry at all times. If the cast gets wet, it can become weak and lose its shape. You can use a plastic bag or a cast protector when the patient takes a shower or bath.
- Elevate the Limb: Encourage the patient to elevate the casted limb above the level of the heart as much as possible. This helps to reduce swelling and discomfort.
- Watch for Signs of Complications: Instruct the patient to watch for any signs of complications, such as increased pain, swelling, numbness, or tingling. If they experience any of these symptoms, they should contact their healthcare provider immediately.
- Follow Up with the Healthcare Provider: Let the patient know when they need to follow up with their healthcare provider for a cast check or removal.
Other Types of Bandages for Support
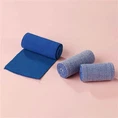
In addition to casts, there are other types of bandages that can provide support and protection for injuries. For example, our Latex Tubular Bandage is great for providing compression and support to joints and muscles. It's stretchy and conforms to the body's shape, making it comfortable to wear.
Another option is our Gel Tube Bandage. This type of bandage contains a gel layer that provides cooling and soothing relief to the injured area. It's also breathable and helps to reduce swelling.
Contact Us for Your Cast and Bandage Needs
If you're in the market for high-quality Cast and Bandage products, look no further! As a leading supplier, we offer a wide range of products to meet your needs. Whether you're a healthcare professional, a sports trainer, or an individual looking for self-care solutions, we've got you covered.
We pride ourselves on providing excellent customer service and competitive prices. Our products are made from the best materials and are designed to provide maximum support and comfort. If you have any questions or need help choosing the right products, our team of experts is here to assist you.
So, don't hesitate to reach out to us for all your Cast and Bandage requirements. Let's work together to ensure the best possible care for your patients or yourself.
References
- American Academy of Orthopaedic Surgeons. (n.d.). Cast Care. Retrieved from [Website URL]
- National Health Service. (n.d.). Casts and Splints. Retrieved from [Website URL]
- Mayo Clinic. (n.d.). Casts and Splints: Care Instructions. Retrieved from [Website URL]